")
I have been sitting on this journal post for awhile now… eight months, to be exact. I’m not sure, when did COVID-19 happen? Yeah, thats when. Basically, when we were told in our county that there were to be NO photos taken, in any circumstance, you could say I maybe, sort of had a panic attack. WHAT was I going to do with my clients!!! They were DEPENDING ON ME. I am an enneagram three, and this sent me into a frenzy. I needed to perform and provide for my people.
So, I decided (during quarantine) that I needed to do something. I needed to provide a service if I couldn’t physically do that for them. Presenting the DIY guide to taking photos of your brand new baby at home! Now, let me be clear and say this absolutely doesn’t replace a professional’s service. I highly recommend always having photos taken by a professional (if possible) because we are the most trained and can provide for you. However, I also know that certain circumstances *cough* COVID *cough* as well as clients potentially not being able to invest in photos at the time can hinder documenting this monumental time.
There are a few things I’m going to cover in this post. First, we are going to talk about camera gear. I do plan on drafting more posts regarding an introduction to photography – especially for those mommas out there wanting to do it for themselves, so I won’t go into TOO many details. I will however, provide some basic recommendations. Next, we will talk about some things I recommend for newborn photos (wraps, blankets, etc). Lastly, we will also cover LIGHTING. This is so important, friends. You neeeeeed to pay attention to light. It will make or break a photo. In the future, I will be talking about editing and will make a separate post about this!
GEAR:
As a professional, I have invested a lot into my gear. I do not recommend you do that unless you’re starting a business or plan on starting one! Other entry level DSLR cameras are just as good to take great, DIY photos. I am a Canon user, so if you have questions regarding other brands I may have to refer you to one of my amazing photographer friends. I started out with a Canon Rebel T2i. This was a wonderful beginners camera and, they have updated this DSLR since then (2009, whoa throwback). A lot of these cameras will come with “kit” lenses, but I’ll be completely honest… they aren’t my favorite and I do feel like they are a waste of money. I started out with the “nifty” 50mm lens and it was WONDERFUL to start out with and was reasonably priced.
SETTINGS:
This could be an entire post itself. But Im going over the VERY basics for you to start with. Three things you need to pay attention to: F-stop (aperture), shutter speed and ISO.
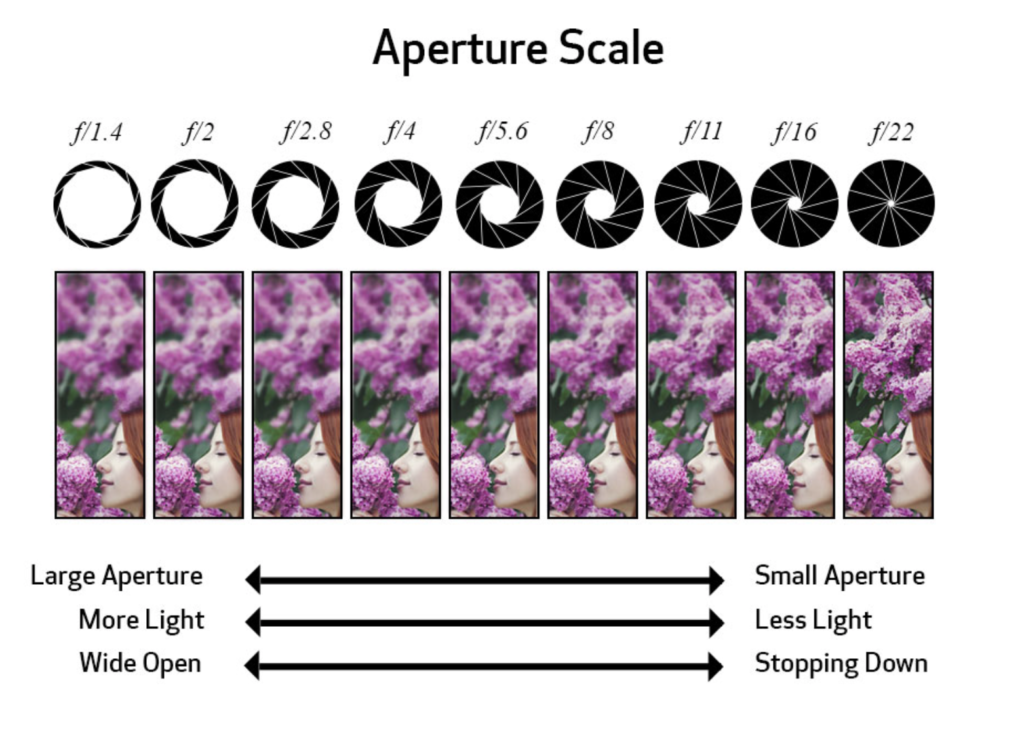
F-stop (aperture) – This has to do with the opening in your lens allowing light into your camera sensor. You know those cool effects with “blur” behind your subject? Yeah, depth of field has something to do with that. Think of it as the same concept with your pupil in your eye… the larger the pupil, the more light is let into your eye… and conversely, the smaller the pupil, the less light. Now, with aperture, a larger aperture (large pupil) is represented by a low number (example: f/1.4). Below is an image that demonstrates this:
Shutter speed: This is, simply, how long your camera allows light into your sensor. The faster the shutter speed, the less light is let in. The slower the shutter speed, the more light is let in! Meaning, it’s open for a longer period of time. This really affects the motion in your photo – if you wanted to see more motion, your shutter speed will be slower and wouldn’t essentially be “fast enough” for that motion. This is something I regularly will adjust based on what Im photographing.
Lastly, we have ISO: This is how sensitive to the light your camera is… The higher the number the more sensitive – this also adds what’s called grain to your photo. This can be an awesome artistic thing to add to your photos and also can be very helpful if you are in a very dark room or low light situations and you would like a faster shutter speed.
Put all of those things together, and voila! You have taken your first manually adjusted photo 🙂
PROPS:
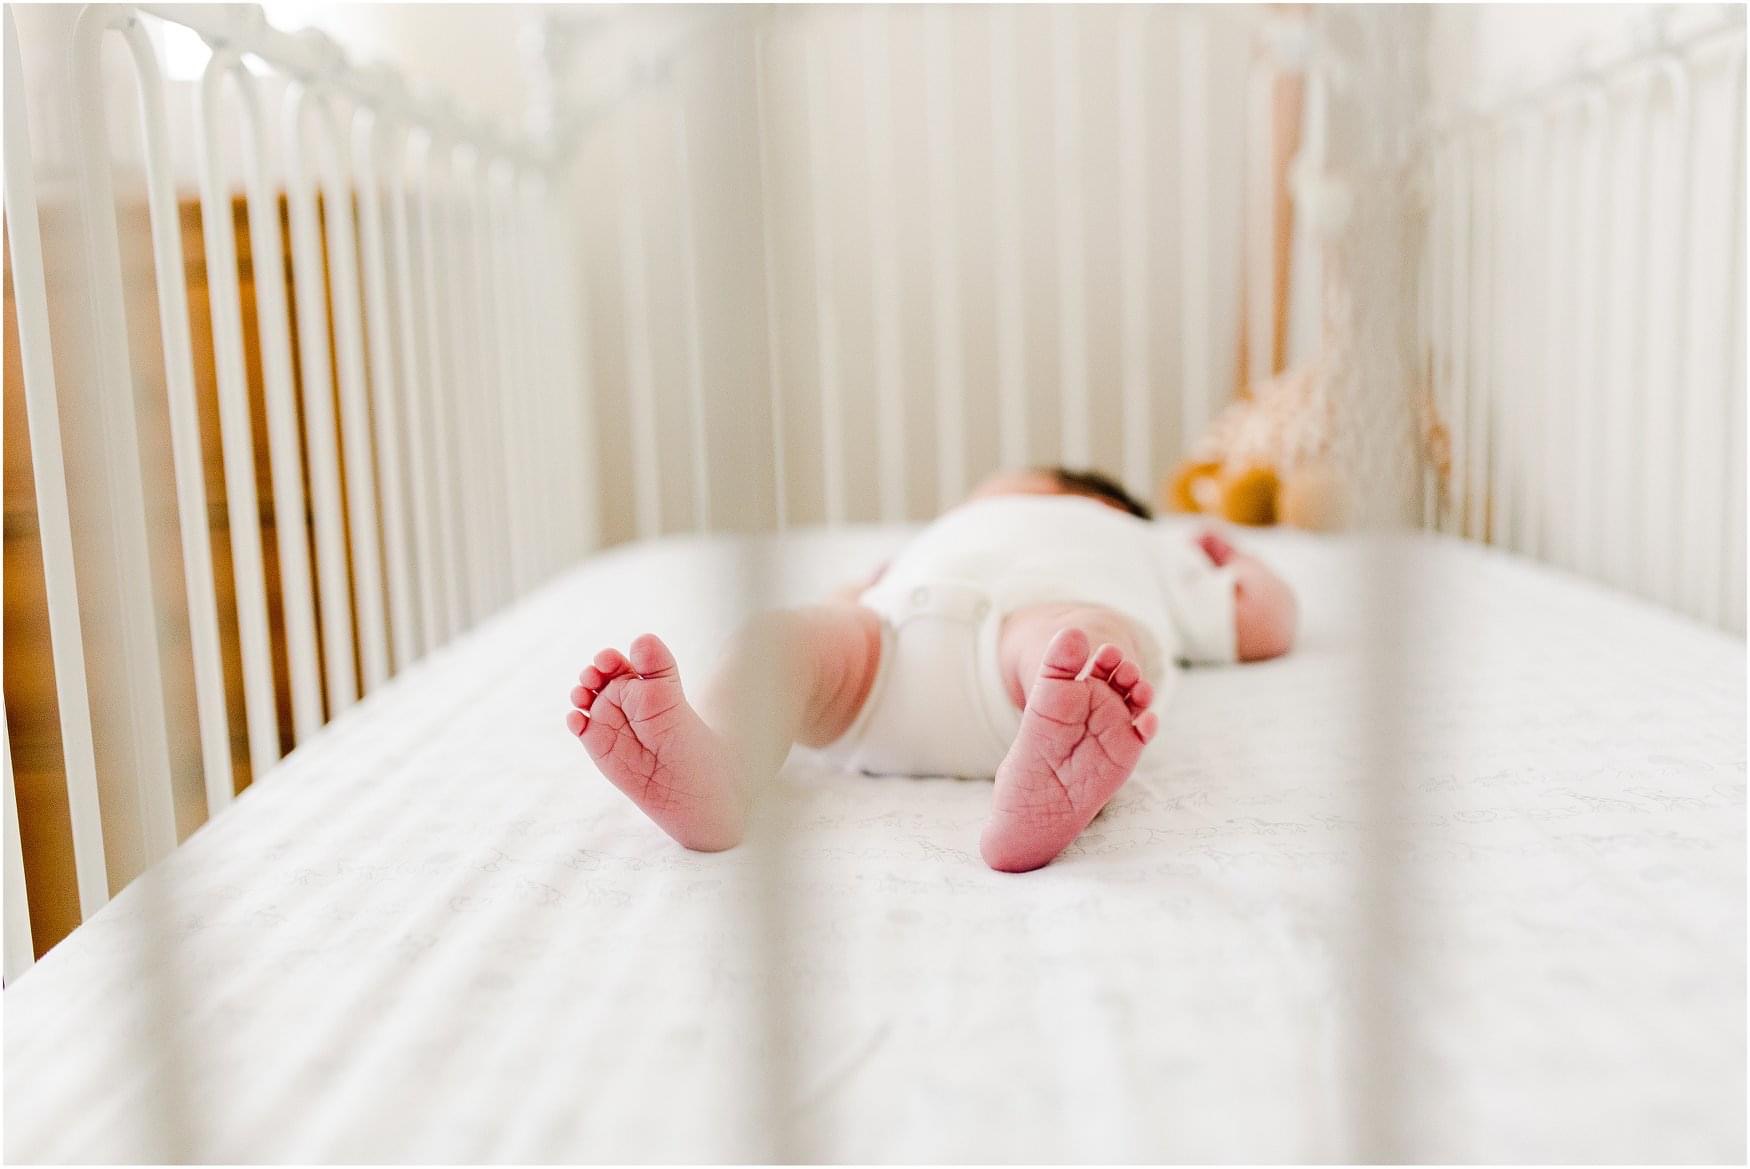
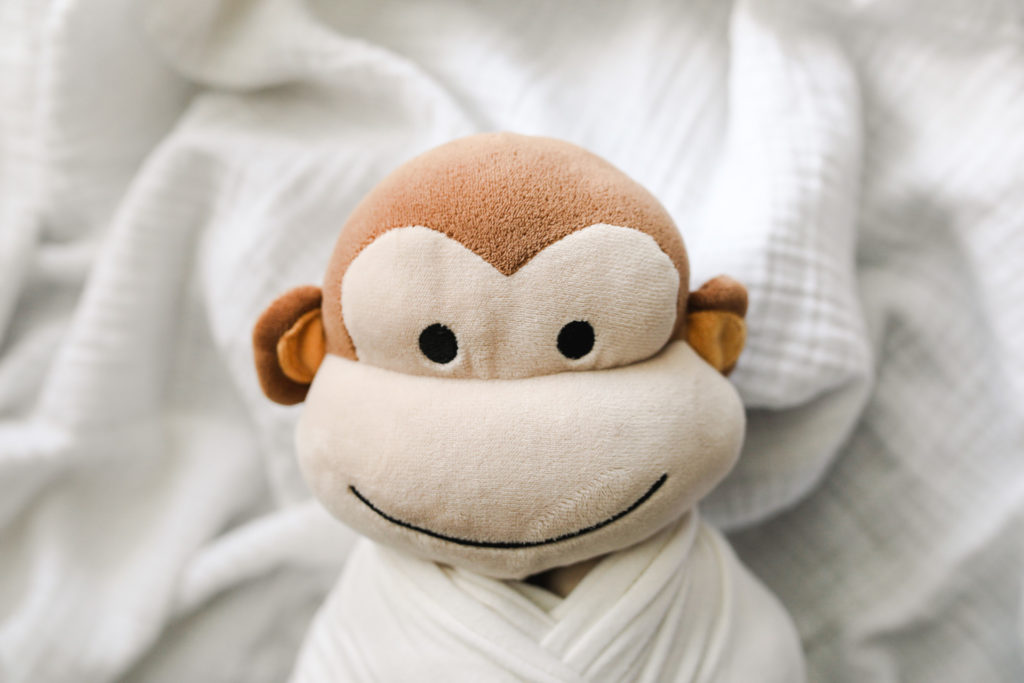
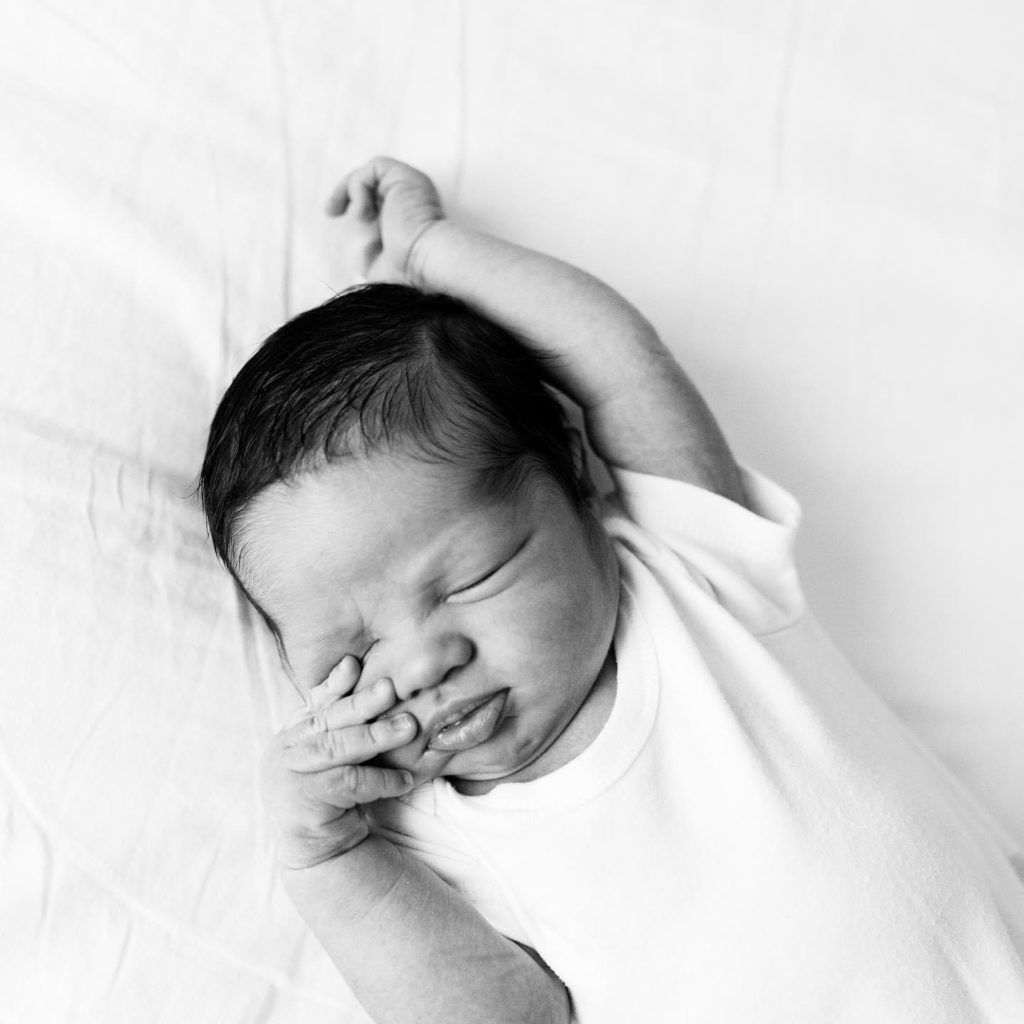
So many things I could recommend here… but if you are taking photos for yourself, or even just starting out I highly recommend going to a local shop for stretchy fabric for wraps. I really prefer my wraps to be extra long so that I can wrap baby up nice and tight…. like more than 100inches. I usually recommend 1-2 wraps for this. You’ll notice in some of my images I use cheesecloth wraps but be careful! These are usually NOT stretchy and so I will use an extra long wrap underneath and then put my cheesecloth over top – also super easy if you want to change out the top wrap and not disturb baby! Check out Red Owl Photo Props on Etsy! They are my absolute favorite. I also highly recommend muslin blankets (found on amazon like below) for something to lay the baby ON. You want something neutral that won’t draw attention away from the baby! If you aren’t into the “wrapped” look – stick with adorable, neutral outfits!
Also… HIGHLY recommend this for photos and new parents!!!
LIGHTING:
OKAY. THIS IS THE MOST IMPORTANT STEP. Why!? Because if you mess up your lighting, your entire image can be messed up. You absolutely should pay attention to lighting and how it is affecting your subject and image. First (since we aren’t in a studio with controlled lighting), we are going to use natural light – so head to those windows! You absolutely want a large window or light source… could even be a door!
You want your subject to be laying next to the light source with the window at a 90-45 degree angle. You NEVER want light going “up the nose” as this is not flattering. You want it coming DOWN the nose and face. Sometimes, it just takes a few minor adjustments and practice photos to see how this looks! Pay attention to your ANGLES. You want to generally be above baby, focusing on eyes, and shooting down the nose, just like the light. You never want to shoot up babies nose.
Also, pay attention to the time of day – if the light seems to be coming through the windows in a harsh way, I recommend using a white sheet or white sheer curtains to help diffuse the light. I have white curtains in my living room for all of the photos below! If the light is harsh, wait for a cloudy day or a later time of day when its more diffuse.
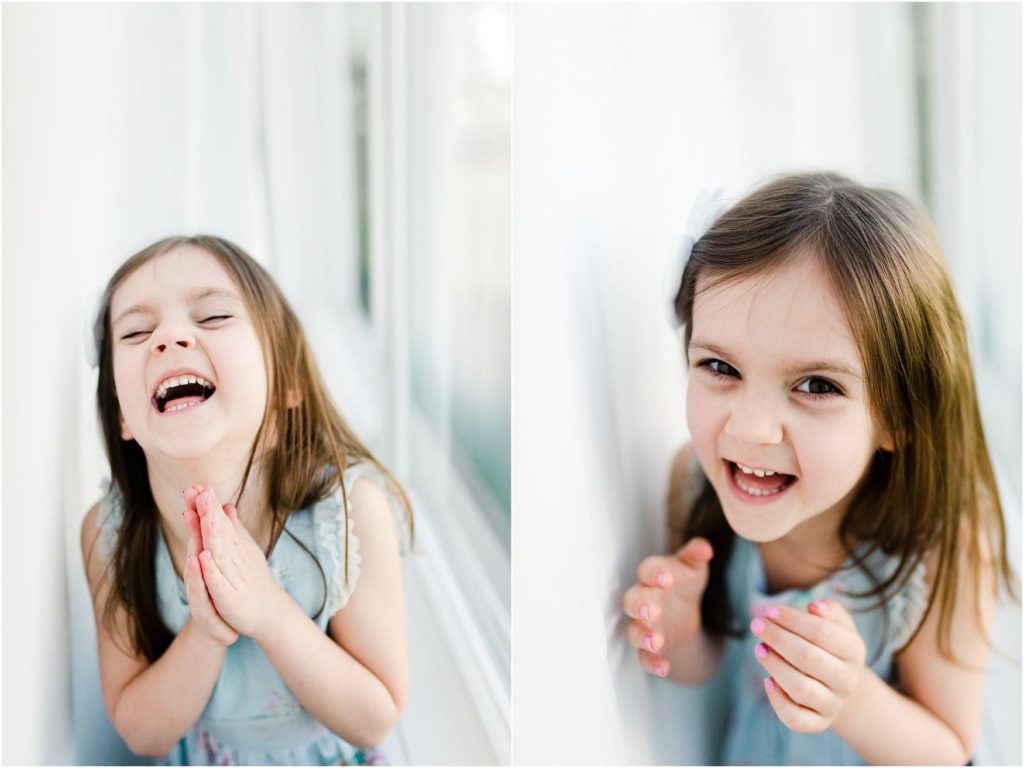
Almost all of these photos were taken at f-stop 2.2 or below, and I adjust my white balance with Kelvin! Talking about those in a future post… 🙂 For now, enjoy these wonderful images of a monkey wrapped up like a baby, little giggles and an actual real life adorable baby that I took photos of in his home!

A couple of things I wanted to mention before I wrap it up (pun intended) – make sure your home is warm, baby is fed and changed and is happy. This will help a ton with how they cooperate. Also pay attention to the time of day and when they are most happiest! Makes a world of difference.
I cant wait to see what you create! Until next time,
xoxo, Abbey


Comments